How To Check And Replace a Coolant Hose
Read Time:8 Minute, 21 Second
Automakers don’t consider coolant hoses a routine maintenance item, so there may be a lack of guidance on how often these hoses should be replaced. Without a specific mileage point or time interval to reference, you have to keep abreast of how your coolant hoses work and wear. In fact, checking and replacing leaking coolant hoses is quick and easy. In this article, we will show you how to check and replace a coolant hose.
What Are Coolant Hoses
Radiator and Heater Hoses
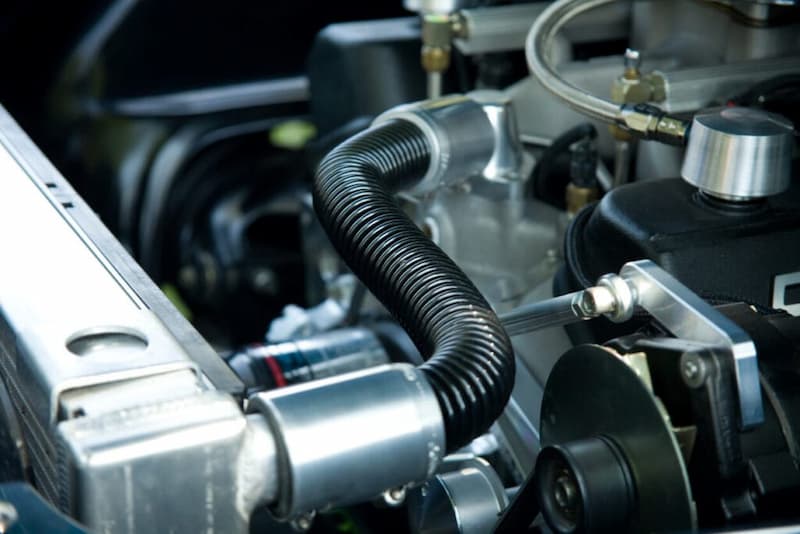
In a typical car cooling system you will find at least 4 main hoses. First, the upper coolant hose goes directly from the thermostat housing (on the intake manifold or cylinder head) to the top of the radiator. A lower coolant hose is attached to the bottom of the radiator. This coolant is drawn by the engine’s water pump, and it releases most of the heat as it passes through the radiator. This hose and the upper coolant hose are the largest of the cooling system hoses and both connect to the front of the engine block.
Next, there are two smaller heater hoses that lead to and out of the heater core located under the dash, providing heat to the passenger compartment.
Coolant Bypass Hoses and Pipes
Coolant bypass pipe, shown in black as separation.
The thermostat remains closed until the engine coolant heats up after a cold start – directing the coolant back to the engine block instead of the radiator. When this happens, the coolant flows through an externally mounted coolant bypass pipe or bypass hose. It sounds like the bypass “tube” is a rigid, non-flexible tube made of steel or plastic, while the bypass “hose” is a traditional rubber compound hose. The design of the coolant return unit varies by car manufacturer. The bypass return line is usually short in length and is often considered the “fifth hose”.
Although uncommon, some engines (like the BMW V8) have their coolant bypass pipes placed in hard-to-reach places inside.
Instead of using externally mounted tubes or hoses, some engines go a step further and use internal passages cast into the front casing of the engine for the return coolant to flow through. There will be a dedicated pipe for coolant in this channel. BMW’s V8 and V12 engines are one such example.
Reservoir overflow hose
There is an overflow hose between the coolant cap and the reservoir to store (and add) extra coolant. As the pressure within the cooling system varies with coolant temperature, a valve in the coolant cap allows coolant to flow back into the reservoir to relieve naturally occurring pressure build-up.
Conversely, if the coolant contracts at low temperatures, more coolant can easily be pumped out of the reservoir to keep the system pressurized. The reservoir also has its own pressure cap – it should not be opened when the coolant is hot.
Checking The Condition Of Your Cooling System Hoses
Easily and quickly check the condition of the hose without removing the hose. Wait long enough for the engine to shut down to cool, then squeeze the hoses in various places. A firm hose that pops out of shape quickly indicates the rubber is in good condition, while a hose that feels soft or doesn’t bounce means the rubber has dried out from age and is more prone to cracks and leaks. Old hardened hoses tend to spill and leak coolant around the connection area first, so be aware of this.
If there is a “crunching” feeling when squeezing the hose, the underlying fabric mesh has been damaged enough to crack and/or break. Such hoses should be replaced as soon as possible.
A visible crack or split on the outside of the hose is another sure sign that the hose needs to be replaced immediately. And, as mentioned, if you see any oil contamination on the outside of the hose, clean it up and touch the rubber. If there are any mushy spots, the hose is badly damaged.
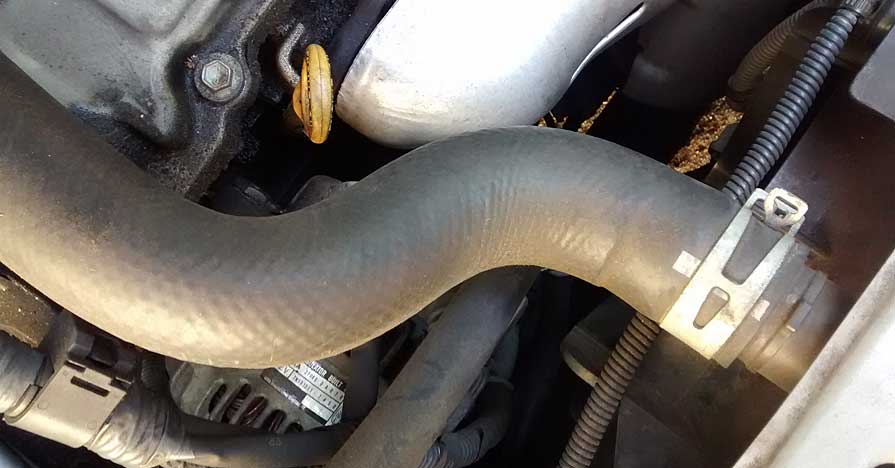
The lower hose is inflated and needs to be replaced.
A swollen hose indicates that the inner fabric mesh at the site is worn and the hose is damaged. If it hasn’t leaked, there’s a good chance it will leak or burst without warning.
If you find any visible coolant leak in the middle of the hose, replace it immediately. For leaks at the end of the hose, check the tightness of the clamp and the hose under that section.
Opportune Times To Replace Coolant Hoses
An under-hood inspection is a surefire way to inspect hoses. After all, most of them can be easily found in the engine bay (again, we remind you to check on a cold rather than a hot engine.) But why wait until the hose is about to fail? Experience tells us that eventually all coolant hoses need to be replaced. Consider the following facts:
Coolant must be drained before hoses can be replaced.
When replacing the radiator, water pump, thermostat or heater core, the hose must be disconnected.
Blowing the hose can cause most or all of the engine coolant to be lost, causing overheating that can damage other components.
The idea of preemptively replacing these hoses before they fail is worth mentioning. Consult your car maintenance professional based on the age and mileage of the vehicle. Replacing all the hoses (and clamps) when flushing the coolant is an example of a sensible preemptive replacement. If you’ve purchased a used car and aren’t sure about its repair history, you may want to be safe and install all new hoses. Of course, it’s better if you do the work yourself, since you can set your own replacement interval (100,000 miles/10 years is a good benchmark)
How To Replace a Coolant Hose
Tools:
- Utility Knife
- Flathead Screwdriver
Materials:
- New coolant hose
- Coolant
- Hose clamps
- Drain pan
- Funnel
- Protective Gloves
- Container for disposal
Steps:
- 1. Check hoses and clamps
Locate the two hoses that carry coolant between the coolantand the engine. One is on the top of the heatsink and the other is at the bottom of the heatsink. Squeeze each hose and it should feel pliable and springy. If it feels soft and weak, or hard and brittle, it needs to be replaced.
Look for signs of swelling or rupture, especially on the fragile underside of the hose.
Check that the clamps hold the hose securely in place and that there is no corrosion. If the clamp is corroded, it needs to be replaced.
- 2. Remove the hose
Drain the coolant from the system before removing either hose. Use a suitable tool to remove the clamp.
If the hose is stuck and cannot be easily pulled out, be careful not to damage the coolant fitting with excessive force. It’s a good idea to cut the hose in a few places so it can be easily removed.
Thoroughly clean the hose fittings on the engine and coolant with fine sandpaper or emery cloth to make a good seal with the new hoses.
- 3. Verify Replacement
Compare the new hose to the removed hose to make sure it is the correct length and diameter.
If the old hose is a molded type, the new hose must also have the same preformed curve.
- 4. Reinstall the hose
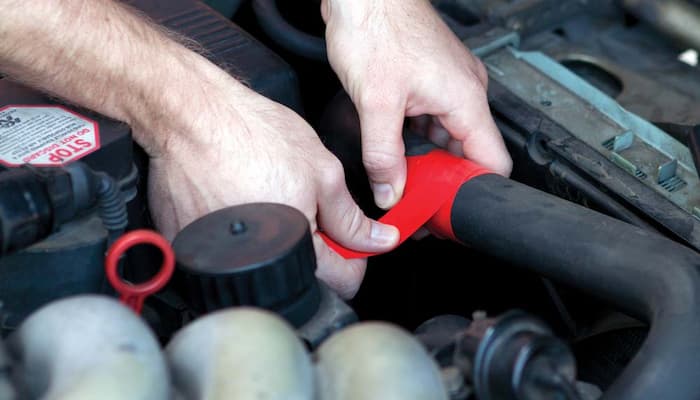
Apply some sealant to the inside of the new hose fitting and place the loose clamp on the end of the hose, then slide the new hose over the engine block and coolant fitting.
Tighten the clamp firmly, about a quarter of an inch or 6mm from the end of the hose.
Be careful not to overtighten and damage the hose. But it’s important that they don’t fall off when the pressure in the cooling system increases.
- 5. Refill the cooling system and check
Antifreeze is toxic, so waste coolant should be disposed of carefully in an environmentally friendly manner.
- 6. Dispose of waste
Refill the cooling system using the funnel and run the engine for a few minutes.
Check hose connections to make sure there are no leaks. When the engine is at normal operating temperature, double check the tightness of the clamps, as both the clamps and the hose expand at different rates when heated.
Close the hood and drive around the block. When you get home, check for leaks under the hood.
Also, check the following video to learn how to replace a coolant hose
Tips:
- Make sure the engine is completely cool before replacing the coolant hose, this will prevent burns.
- Never drive the vehicle if a leak is suspected – this may cause the engine to overheat.
- Be sure to replace both the upper and lower coolant hoses to prevent repeating this step or failure in the future.
- It is recommended that you replace the clamps at the same time as the hose, replacement clamps are cheap and will ensure that the clamps do not corrode or lose their springs, causing leaks.
Conclusion
Replacing a leaking coolant hose on a car is fairly easy. All you need is some basic tools, a basic knowledge of vehicle design and some coolant changes. While you can always tap up the gap to prevent more fluid from leaking out of the hose, it’s best to fix the problem permanently. If you learn how to replace a leaky coolant hose, you can save money on a mechanic and give yourself a sense of accomplishment.
Read the following post about spare parts replacement if you are interested!
- How to Change Your Cabin Air Filter – Everything You Need to Know
- Water Pump Replacement Cost – Price Comparison 2022
- How Long Does it Take to Charge a Car Battery -What You Should Know?
- How To Remove Rain X Wiper Blades
- How Much Does It Cost to Replace An Alternator?
- How to Prevent and Remove Rust on Your Car
- How to Remove a Stuck Door Hinge Pin?
- How Much Does a Fuel Injector Replacement Cost?
- How to Change an Audi Key Battery
- How to Replace An Engine Splash Shield

Average Rating