How to Get Moisture Out of Headlights
Read Time:6 Minute, 45 Second
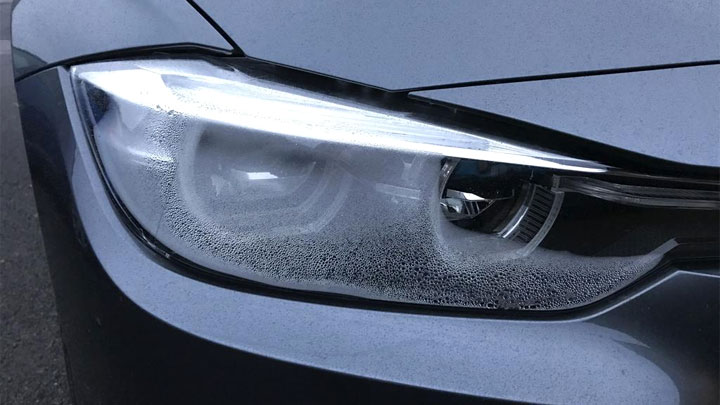
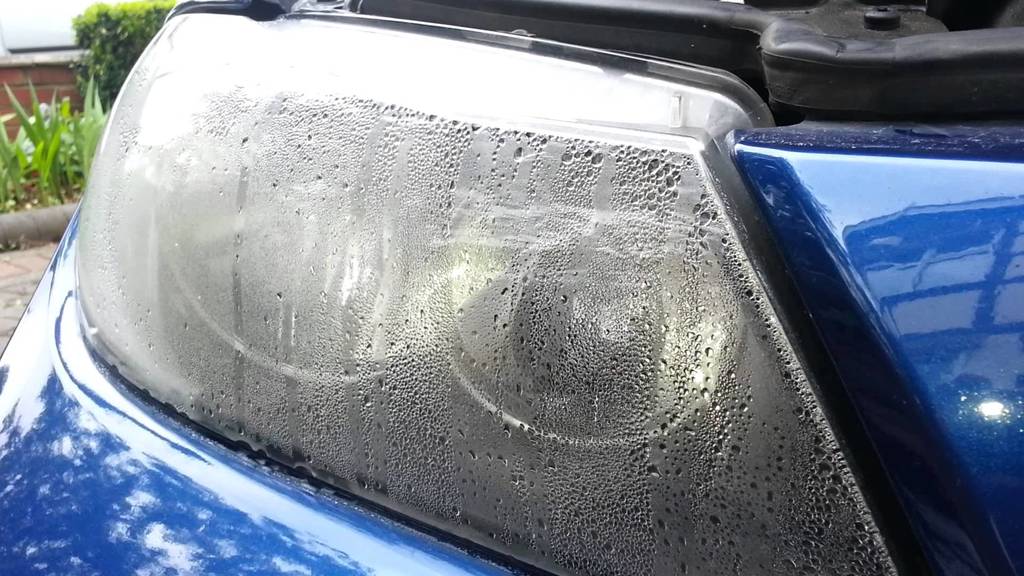
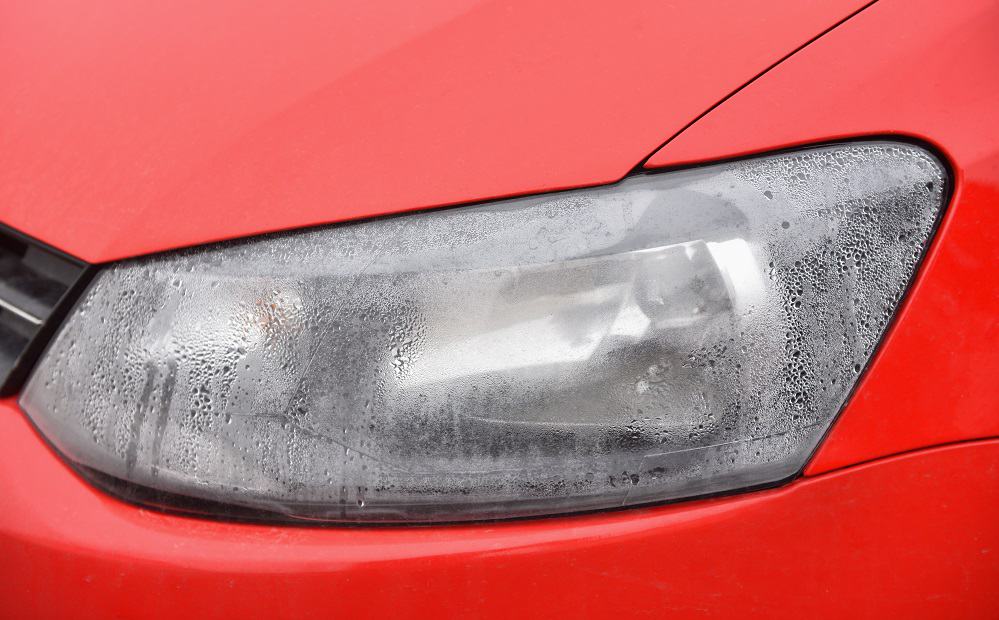
Missing headlight bulbs and dirty headlight housings can significantly reduce night vision. However, sometimes the problem is caused by moisture inside the headlamp assembly. Either way, too much moisture in the headlamp assembly is a big deal. Determining how the moisture got there plays an important role in what you need to do to get it out, and if you’re wondering how to remove moisture from your headlamps, here are some helpful tips and tricks to help you recover before The entire field of view of the light.
Is Condensation in the Headlight Assembly Bad?
sure. There are several causes of poor condensation in the headlamp assembly. First, the electrical components are surrounded by water, which is always bad. You can short out the system, corrode wires, and create many problems that require additional repairs.
Not only that, but condensation in the headlights can also cause fogging of the headlights. When you turn on the headlights, a lot of light is blocked by condensation, which means you won’t get enough visibility. It’s not hard to see why this is a big deal.
What Causes Moisture to Get in a Headlight?
There are three main causes of moisture inside a headlamp. Either of these can also be applied to other exterior lights such as fog lights, tail lights, and side markers.
Headlight Vent
Your headlamps need ventilation because your headlamp housing heats up when you drive, and cooling air needs to flow into your headlamps to cool the heat from the lamps. Headlamps use vents to push hot air out of the surrounding area and draw cool air from outside the car. Once headlamp ventilation is lost, condensation water will collect in the headlamp and limit the amount of light available when driving at night. Headlight vents can become clogged with cobwebs, dust, road debris, or even a combination of the three. You’ll need to clear all of this to ensure your vehicle can use the ventilation system to remove moisture.
Headlight Seal
This will allow water to enter the headlamp, increasing condensation around the headlamp assembly. Sometimes it’s hard to see this, especially if there’s a problem with the seals. There are many ways to test this and make sure this is the problem, some are even as simple as putting your vehicle through a wash and then checking the water level on the headlights and lenses. If there’s anything wrong with your seal, it’s constantly letting water flow from the outside of the car back into the headlights, dimming your lights, or creating blind spots when driving at night. This can make driving quite dangerous and you must be vigilant.
Damage to Headlight
Finally, it could be a cracked or damaged headlamp assembly. If that’s the case, you’ll either need to get creative with repairs or, more likely, replace the headlight assembly.
Will Headlight Condensation Go Away?
Headlamp condensation may not last forever, nor does it necessarily mean the headlamp needs to be replaced.
A small amount of moisture on the lens will disappear after a few minutes of driving the car, as the moisture can be related to the outside air being cooler than the headlamp, and vice versa because the lens is cooler than the air outside the headlamp.
This can be solved by letting the car run for a few minutes before driving, which will balance the temperature and allow the moisture to evaporate from the headlights.
Another common remedy is to use natural methods if you notice lens fogging and increased moisture inside your headlamps! Let your car sit in the sun for about half an hour, which will heat up the headlights, initiating the same moisture evaporation technique in the area that you would drive for a few minutes.
Tips for Removing the Condensation in Your Headlights
The process of getting condensation out of your headlights will depend on how severe the problem is and what the underlying cause may be. Here are a few tips:
- Let the moisture dry on its own
Sometimes, when the headlights are turned on, the moisture will dissipate on its own and the heat will cause it to evaporate. Putting the car in the sun can have the same effect.
- Use a hair dryer
Remove the headlamp assembly, remove it without damaging the headlamp seal, and dry the parts one by one with a hair dryer. A temperature of around 180 degrees Fahrenheit is recommended to avoid damage to wires and deformation of rubber parts.
- Try compressed air
You may want to check for clogged headlight vents, as this can also cause some slight condensation. If this is the case, try blowing out the debris with some compressed air. Be careful not to end up pressing debris into the housing.
- Replace headlamp assembly
If all else fails and moisture keeps coming back, the headlamp assembly may have to be replaced.
Check to make sure all bulb covers on the back of the headlamp assembly are intact. A missing or loose bulb cover can allow moisture to enter the headlamp.
With much more water in the headlamp than usual, you’ll want to inspect the assembly for cracks or damaged rubber spacers.
If the headlamp assembly is cracked, it will need to be replaced. On the other hand, rubber gaskets can often be replaced separately from the lighting assembly.
How To Prevent Further Moisture
The key to preventing further moisture is to form a strong seal. There are many products that can help you rebuild a strong seal. First, inspect the seals for any damage or debris. If necessary, apply a strip of silicone sealant around the factory seal area to ensure moisture cannot get into the assembly, or replace the seal if your case uses a replaceable seal. You’ll also want to check the O-rings that protect the headlight assembly’s electrical connectors, bulbs, vents, and other components.
Consider purchasing some quality products to promote a strong seal. Silicone spray is very effective for protecting O-rings, and silicone sealant can be used to repair any cracks or seal damage between the lens and housing.
With the headlights carefully inspected and sealed, it’s time to reinstall. Check that the angle is correct and that all brackets and electrical connectors are securely in place. Test your light to make sure it’s working properly and bright. Check your headlamps regularly for any signs that they may not be properly sealed.
Should You Replace Your Headlights?
Not all of the things listed above are cause for major concern. Some of these are negligible and may not require immediate attention. If your headlight looks like a small aquarium, it’s likely that the headlight assembly needs to be replaced.
However, if the condensation level is normal/semi-normal, meaning the light is still shining through the condensation, then you’re probably only dealing with natural phenomena.
How To Get Moisture Out Of Tail Light?
Your taillights are useful for drivers following you at night and can help you avoid some very expensive accidents. Once condensation begins to collect in the taillights, it will cause the taillights to not work properly or even burn out the lights in the taillight lens prematurely.
Moisture in the taillights must be removed, and the same method used to repair the headlights can be used. The only thing you really need to consider is that you might have a hard time telling when the taillights are starting to go out since it won’t affect your vision at all. When performing routine maintenance on your vehicle, be sure to check your taillights to avoid more costly damage
Conclusion
If water continues to get into the headlamp after repairs, it’s most likely a faulty seal or a clogged vent. You can re-attempt to repair or replace the headlamp assembly.
While replacing headlight assemblies isn’t always cheap, it’s better than shorting out the system and causing a fire or reduced visibility at night and causing an accident.
Whatever you do, don’t let the headlight assembly get wet. It’s only a matter of time before a little trouble turns into a big one.
Average Rating